7/26/09

Revised Jedi Temple, Part 3

I only made minor changes to the Jedi Temple model last week.

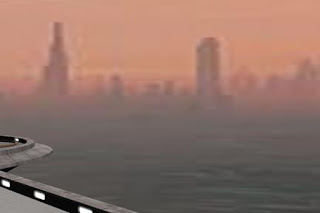
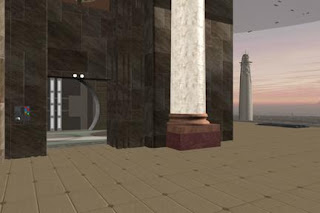
Here are before-and-after pictures of Scene C104e:

If you look through the blast door opening, you can see that I added a roof so that the orange sun doesn't shine through the ceiling and affect the color of the interior walls. I also added some interior lighting and shadows, which gives the interior blast door a more 3D look.

I also added a Jedi Temple spire to the background to help establish this location as being the Jedi Temple for the audience.

Here are before-and-after pictures of Scene C116b:

It's hard to tell in these images, but the lighting on our Jedi Temple model didn't match the lighting on the matte painting of the Coruscant cityscape. This will be more obvious in the next set of before-and-after pictures.
However, you can see that the lighting has changed drastically. I also added a couple boxes to the end of the landing platform, and I added a bunch of lights corresponding to the white (fake) lights along the railing so that there's a nice white glow on the landing platform in front of each fake white light.

Here's a close-up of the end of the landing platform:

In this comparison, the corrected lighting is easier to spot. If you look at the "before" picture, you can see that the shadow on our Jedi Temple spire was on the left side, but the shadows are on the right side of the buildings in the matte painting of the Coruscant cityscape.

In the "after" picture, the lighting (direction, color, and shadows) on our Jedi Temple model match the background matte painting.

I also added a few boxes for set dressing. I don't really know how to use 3ds, so it took me a few hours to create each box. Kind of pathetic, but at least they turned out O.K.

I based our new boxes on reference photos from "Star Wars: The Old Republic," a new game that's coming out soon. Here are the reference photos side-by-side with our boxes, so that you can compare the two:


Of course, these aren't exact matches -- only because I don't know how to use 3ds very well and didn't want to spend a bunch of time creating these models. But at least they look like real "Star Wars" containers and give our movie an added touch of realism.

Later,
Bob

7/16/09

Revised Jedi Temple, Part 2

I spent more time improving our Jedi Temple model. Here are before-and-after pictures of Scene C104e:

As mentioned last time, the matte painting of the background was temporary and cut-off at the top.
As you can see in the "after" picture (2nd picture, above), I fixed the background matte painting. I also changed the color of our lights to match the color of the sunlight in the matte painting.
If you look carefully, you can see that I need to add a ceiling to the building because the colored sunlight shines through the top of the current model and changes the colors of the interior walls. Oops.

Here's another before-and-after shot, showing the landing platform with improved texture maps, as well as the improved matte painting:

MUCH better, right? Not only do the new texture maps make the landing platform look more realistic, but the background matte painting looks great! Believe it or not, it's an actual matte painting used in "Star Wars: Revenge of the Sith". If you want to see the actual matte painting (and a bunch of other cool ones from "Star Wars"), click here.

You may also notice that I added a Jedi Temple spire. This is to give the audience a visual cue that establishes this shot at the Jedi Temple, rather than some random landing platform on some random planet.

Here's a close-up at the edge of the landing platform, before-and-after:

If you look closely, you may notice that I made the landing platform shiny (it's brighter on the right than on the left). Small touches like that add dimension and make our models look more realistic.

Here's a different camera angle (which will not appear in the final movie, I just took this screenshot for the blog):

This close-up shows the new texture maps and soft specular highlight (i.e. the brighter spot on the right side).

Here are before-and-after pictures of Scene C116e when Brad speederbikes away from the pursuing Clone Troopers (Brad is NOT in these screenshots, so don't bother looking for him):

BEAUTIFUL! Can you believe that's the exact same camera angle? Man, our movie's going to look awesome!
(Of course, I'll add more streams of traffic to the final shot.)

I'm still not done with this model, but you can see where I'm at right now. The next set of pictures should look even better!

Later,
Bob

7/6/09

Revised Jedi Temple

I was going to post another blog update last week, but I was in the middle of "open heart surgery" on the Jedi Temple model. It wasn't in any condition to show you guys screenshots, so I had to wait until this week.

After researching reference photos of the Jedi Temple, I decided to completely change our CG model. I was originally going for the "used universe" look that "Star Wars" is known for, but I realized that the Jedi Temple model looked like a lot of our other digital sets.

I wanted to give the Jedi Temple a more distinctive look, so I went with an elegant, majestic look. For example, here's a reference photo of a Jedi Temple (NOT the one on Coruscant, but a Jedi Temple nonetheless):

I paid particular attention to the huge statues, brickwork, columns, and tile, as can be seen in the following before-and-after picture of our model:

Hard to believe that's the exact same camera angle, right? About the only thing that's the same is the door and interior detail.

As you can see, I made the Jedi Temple much taller to make it more majestic and palace-like. I also added the huge statue, brickwork, columns, and tile, as inspired by the reference photo above, as well as the statue in the following reference photo of the Jedi Temple interior:


Unfortunately, the taller building blocked the view of the distinctive Jedi Temple spire. I wanted to keep the Jedi Temple spires visible so that the audience could easily identify this location as the Jedi Temple, so here's another before-and-after picture showing the new location of the Jedi Temple spire:

Again, hard to believe it's the same camera angle, right?
This is still a work-in-progress, so that's why the background image of the skyline is crappy (I moved it farther away, but didn't increase its height, which is why it's cut-off at the top).

Since I moved the Jedi Temple spires, I used a "Star Wars" reference photo for the new location. Here's a reference photo side-by-side with roughly the same camera angle on our model:

The reference photo is from the "Star Wars: The Force Unleashed" video game. I haven't finished this model, so the texture maps, geometry, traffic, and background are still temporary. However, you can see that I put actual 3D buildings in for the Coruscant cityscape, rather than the old temporary photo (as seen in the following photo):

This isn't the same camera angle, but it's close enough and at least you can see the old (temporary) background image.

Here's the final before-and-after comparison:

Big difference, huh?

I'm still working on this model, so these are photos of a work-in-progress. The final model will probably look significantly different. Still, I think this is a step in the right direction, as opposed to the previous "used universe" look that I was going for.

Later,
Bob